
Why do this?
Simple answer is, if you want to achieve the highest possible quality audio at the “4K option” on Youtube and Vimeo without a bulky file size. This is a particularly great method for making album videos such as this (video is 55 minutes long, featuring high-resolution audio and one image on loop).
Secondly, this method is entirely necessary for achieving, in tandem, the highest possible quality audio and video using Vimeo Pro, which has an upload limit of 20GB/week and 1TB/year.
Video/Audio Quality
It’s well established that if you want the best results for streaming video/audio quality on Youtube and Vimeo, that you need to upload the largest, most uncompressed, file you possibly can. The theory here being that giving Youtube/Vimeo as much information as possible at the onset, bypasses unnecessary stages of conversion and essentially leaves all (or most) of the compression/conversion responsibility up to the streaming services’ respective inner workings. In short, you are left with just one stage of compression/conversion.
Encoding quality has changed drastically on these platforms throughout the years, and I remember the days, not too long ago, when I would spend weeks on end comparing high-bitrate X264/.MP4 uploads to full-resolution raw .MOV uploads of Super 16mm film source content. I’d usually have to end up weighing the balance between better color replication on the side of the X264/.MP4 uploads <vs.> better definition of extremely-hard-to-compress film grain with .MOV uploads.
As far as I can tell from the extensive testing I’ve done on both Youtube and Vimeo this year, this is no longer an issue. There is no more compromise. The basic rule of thumb is now: upload the largest, most uncompressed file possible.
For music videos or any shorter videos, that even at “uncompressed” 4K settings are anywhere under 100GB (I use quotations because I work mostly with Apple ProRes HQ), I would almost always recommend setting up the highest-speed internet connection possible (I’m a big fan of ethernet cables), and then taking a swipe at uploading your full resolution file.
However, if you run into a situation like I did with the last two album videos I made for Youtube (bottom of this post), where 99% of the point of the video is the listening experience (having the best audio quality possible), and 99% of the file size of the full resolution video file is a result of the visual aspect (which for me generated a ≈ 300GB file), then there is as really cool trick you can do to compress only the visual portion of the overall video file and leave the audio completely untouched.
Intro
Before we get into the particulars, I must first preface all of this by saying, yes, I am unabashedly still using Final Cut Pro 7 (for sake of familiarity, what is still far and away the most aesthetically pleasing NLE, for the amazing “self-contained” export feature, and for the fact that I work almost entirely with ProRes film scans which I do very little to in post besides some minor tweaks with the three-way color corrector). Having said this I am becoming increasingly found of Davinci Resolve 15, which I have used for extra color correction in the past as well as for grain management and cleanup. I’m also using Resolve to edit my latest project which I received as uncompressed CRI files, and also to process Cinema DNG files from my recently acquired Ikonoskop A-Cam DII.
Step 1: Exporting a “Self-Contained” Master File
Like I said, this is one of the main reasons why I love FCP7: that you can export a timeline as a stitched-together raw .MOV file without any re-encoding or compression (FCP7 – User Manual, page 387).

At this moment, I’m not 100% sure how or if this feature has been replicated in FCPX (or any other NLE for that matter), but exporting a master file may be the FCPX way of doing the same thing as exporting a “self-contained” file out of FCP7.
For more specifics on properly importing picture files to avoid gamma shifts (for album artwork in album videos for example), and for properly importing audio files so that they do not incur another stage of compression in FCP7, see this point in the video tutorial above.
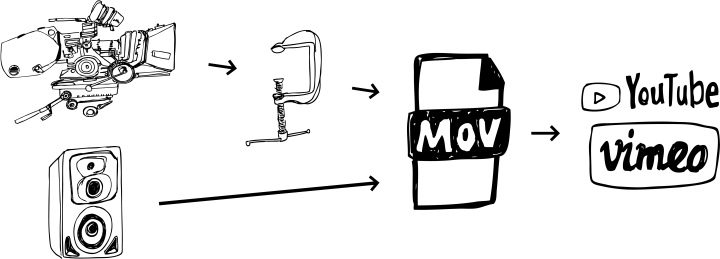
Step 2: Compressor
Even more important to this process than FCP7’s self-contained export featured, is Compressor 3’s “audio pass-through” setting. This is the crux of creating an overall video file with compressed video and uncompressed audio.
See Compressor 3 – User Manual, page 237.

As is highlighted at this point in the video above, I recommend creating a new custom preset titled something like, “X264 Video w/ Uncompressed Audio” and then tailoring the settings in the Inspector as follows:
File Format: “Quicktime Movie” (.mov)
Under the video settings dialogue box…

- Compression Type: x264 Encoder
- Compressor Quality: Best (all the way to the right)
- Encoding: Best Quality (Multi-pass)
- Data Rate: Restrict to [whatever your heart desires depending on your particular project and target file size; 10,000kbs is perfect for a superb 4K album video assuming that your album artwork was high resolution in the first place]
*An important step that I skipped in the tutorial video, particularly for rendering 4K (or anything at all for that matter), is the dimension settings under the “Geometry Pane” tab ![]() . Set those, under “Dimensions (encoded pixels)”, to correspond to the specific dimensions of your .MOV self-contained video file.
. Set those, under “Dimensions (encoded pixels)”, to correspond to the specific dimensions of your .MOV self-contained video file.

Apart from this, all of the other settings in Compressor can be left as is or customized as needed. But, for the two 4K album video examples below, I did exactly as I’ve outlined here and achieved fantastic results in terms of audio and visual quality.
The Final Product
There are likely very few videos on Youtube that have even come close to the achieved streaming audio quality of these two album videos. Firstly, because they were captured at 24bit/96khz using the Pacific Microsonics HDCD Model II AD/DA (via mine and Tyler Burns’ capture method to Tascam DA3000 CF) and Lynx Hilo AD/DA converters, respectively. Secondly, because this process of creating video files with uncompressed audio has essentially allowed me to “drag-and-drop” files from the Tascam DA3000 compact flash card, or my hard drive, straight to Youtube’s compression mechanisms, which in the case of uploading one’s own material, straight from the studio, bypasses all the conversion/compression involved with ripping or digitizing any hard media, even so-called “20bit” and “24-bit” CDs (which of course are still 16bit/44.1kHz files on the actual disc).
I harp on this because there is a lot of material on Youtube labeled “audiophile” and “24-bit” that I would be willing to bet is either from CDs or, even on the rare chance it was downloaded from HD-Tracks or the like, has undergone massive conversion to AAC or MP3 in the process of it becoming a video “prepared” for Youtube. There may be exceptions to this rule that I’m not aware of, but almost all professional video editing and conversion software I’ve worked with in the past, including $1K+ programs such as Sorenson Squeeze, have imposed some sort of “necessary” audio compression/conversion in conjunction with whatever video compression/conversion you are doing—at least for anything that is considered a “web video codec.”
After all, Youtube itself still “recommends” uploading already compressed audio and video, with the proposed idea being that if your video has been properly encoded that it will bypass some of their conversion mechanisms. This has never proven particularly effective in any of my innumerable encoding tests over the years. Youtube has always seemed to reconvert everything I give it, somehow, some way, even following their recommendations needle-pin down to the b-frames. I say this having mostly worked with film scans over the years, which are particularly testy to encode for the web (especially if there is any running grain), but I’ve heard the exact same complaint from many if not most people I know working with strictly digitally sourced content. But as I outlined at the beginning, all of this is essentially meaningless now that the proof is in the pudding for me with regard to uploading full resolution .MOV video files of my music videos/any videos that are not just one static frame of album artwork.
Also worth noting, is that many folks throughout the years, on many video production forums, have speculated that the upload recommendations (video bitrate, etc) on Youtube and Vimeo have been tailored more for controlling the flood of data to their servers than for sake of achieving the best possible end product for their users.
Tyler Burns – Anglo Arts Rhythm Monster [Cassette + Bonus Tracks]
(Pacific Microsonics HDCD Model II 24bit/96kHz Capture)
Latlaus Sky – Something Like Glass/The Other Shore [Cassette]
(Lynx Hilo 24bit/96kHz Capture)
Alec Eagon is an analog-obsessed filmmaker, photographer and music producer based in Portland, Oregon.
Portfolio: aleceagon.com
Instagram: instagram.com/aleceagon/
Twitter: twitter.com/aleceagon
Vimeo: vimeo.com/aceagon
Youtube: bit.ly/2eGXexz
